- Question
How do I manually set up my wireless router for cable in Windows?
- Answer
-
Note: if you use the new Virgin Media Hub or Super Hub – our combined modem and wireless routers for cable customers – you can find the appropriate guides here:
How do I set up the Virgin Media Hub? or How do I set up the Virgin Media Super Hub?
Connecting wirelessly to the Virgin Media Hub/Super Hub on Windows XP
Connecting wirelessly to the Virgin Media Hub/Super Hub on Windows Vista
Connecting wirelessly to the Virgin Media Hub/Super Hub on Windows 7
The setup CD that came with your wireless router pack should let you set up your wireless router to work with your modem. If you’ve had any trouble running through the setup, or if you’d like to set up your wireless connection manually, follow the steps in this guide.
Before you begin
Here’s a list of all the things you need before you get started:
- Wireless router
- Yellow Ethernet cable
- Power supply
- Router stand (optional)
- Wireless setup CD and setup guide
- USB wireless adapter for desktops (optional, only provided if ordered)
- Wireless card for laptops (optional, only provided if ordered)
Your cable modem should’ve been installed separately, so you won’t find it in your router pack.
Uninstalling Wireless Manager (for Netgear 'G' series wireless routers only)
To set up your wireless connection manually, you’ll need to uninstall the Wireless Manager software, if it’s installed. This is because Windows' built-in wireless networking software can’t control your connection while Wireless Manager is working. Remember, Wireless Manager is only installed with our Netgear 'G' series of wireless routers.
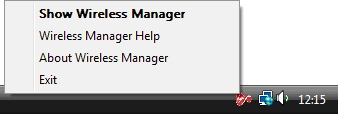
First, if Wireless Manager is running, exit it. To do this, right-click the Virgin Media icon in the system tray (usually in the bottom-right of the screen, near the clock) and click Exit.
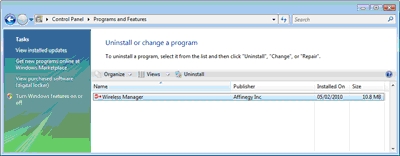
Now go to Start > Control Panel and double-click Add-Remove Programs(for Windows XP) or Programs and Features (for Windows Vista). Click once to select Wireless Manager from the list of installed programs and then click Remove or Uninstall.
Once the Wireless Manager software has been removed, restart your PC before you move onto the next stage.
Setting up your wireless router
Ready? Great. Just make sure you follow each step in the right order and you’ll be up and running in no time.
Step 1: First, disconnect the power cable from the modem.
Step 2: If your modem is connected to your PC, disconnect it. You shouldn’t need this cable any more, so just stash it somewhere safe.
Step 3: Put your wireless router close to your cable modem and near a power socket. You might want to put it in the router stand, but that’s up to you.
Remember, where you put your wireless router can make a big difference to how well it works. To find the best place to put it, read our article, Where should I put my wireless router?
Step 4: Plug in your modem's power cable but don’t switch on the power yet!
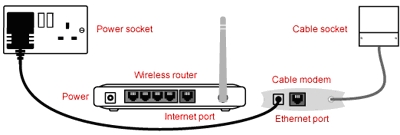
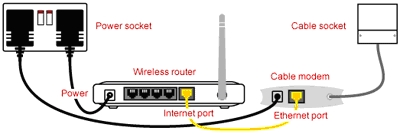
Step 5: Connect one end of the yellow Ethernet cable to the internet port on your wireless router and connect the other end to your modem.
Now switch the power on and the modem will start up.

Wait for most of the lights on the cable modem to turn solid, which means there’s a connection to the internet. This should take around 60 seconds. One or two of the lights might flicker – this just means the modem’s doing its job.
Step 6: Now connect your wireless router's power cable and switch on the power.
Wait 60 seconds for the lights on the front of the router to settle down. The Power and Internet lights should both be solid. Again, there might be some flickering of the lights, but this is normal.
Step 7: Now that everything’s powered up and ready to go, you can try connecting your PC to the wireless router.
If you’ve installed a wireless USB adapter, you might need to use its own software to connect to your wireless router. Either way, the connection process is similar to the one below.
Windows XP users
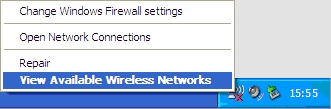
The quickest way to connect to a wireless network is to use the icon in the system tray. If you can see the broadcast symbol, right-click it and selectView Available Wireless Networks.
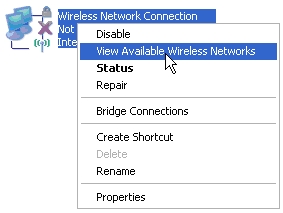
You can also go to Start > Control Panel > Network Connections, right-click the Wireless Network Connection icon and click View Available Wireless Networks.
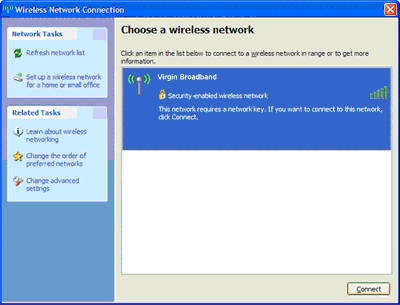
Whichever way you do it, Windows will now show you all the available wireless networks, along with information about their security and signal strength.
Your wireless router should appear in the list as Virgin Broadband. Click it and then click Connect.
Next, you’ll be asked for your wireless router's WPA passphrase. The default passphrase is preinstall. Type it into both boxes and click Connect.
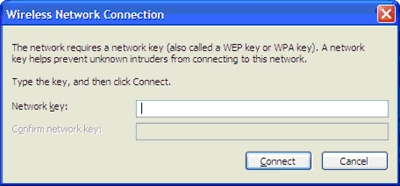
Once your passphrase has been accepted, you’ll be connected to your wireless network. Skip the next bit and move straight onto Step 8.
Windows Vista users
The quickest way to connect to a wireless network is to use the icon in the system tray. If you can see the network symbol, right-click it and selectConnect to a network.
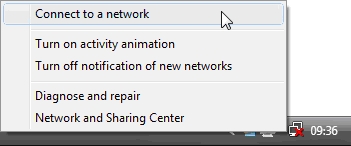
Alternatively, go to Start > Connect To.
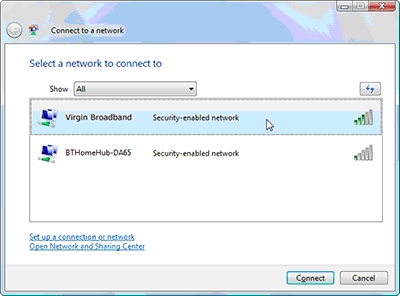
Windows will now show you all the available wireless networks, along with information about their security and signal strength. If you don't see any wireless networks listed, make sure that the Show dropdown menu is set either to All or Wireless.
Your wireless router should appear in the list as Virgin Broadband. Click it and then click Connect.
You’ll then be asked for your wireless router's WPA passphrase. The default passphrase is preinstall. To see the passphrase on the screen as you type it, tick the Display characters box.
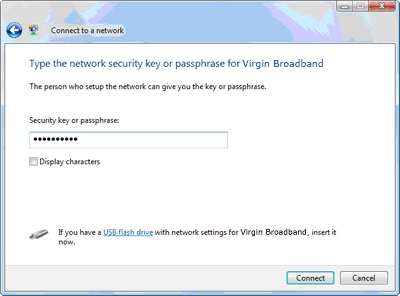
Once your passphrase has been accepted, you’ll be connected to your wireless network. When it prompts you, choose to save the network settings and choose Home as the type of connection.
Step 8: Next, start up your web browser.
If you haven’t configured your wireless router before, you should see a Wireless Setup page in your browser. This will take you through the final step of setting up your wireless connection.
To enhance the security of your connection, you can use the Wireless Setup page to change some key information that defines how you connect to the wireless router, as shown below:
Name (SSID): This is the name of the wireless network that you see when you do a scan for available wireless networks. You can set this to just about any name you'd like instead of the default name, Virgin Broadband. Try not to use a name that might give away your identity or address, though.
Security Passphrase (WPA-PSK): This is basically a password that people need to log onto your wireless network. Choose a strong password to stop unauthorised users from connecting to your wireless network, preferably with a few numbers in it. You'll need to remember this passphrase if you ever want to connect another computer to your wireless network.
Channel: This is the frequency that the wireless router operates at. You can choose any of the available channels, although some might give you a poor performance, depending on which ones are being used by other nearby networks. We recommend using channel 1, 6 (the default option) or 11.
After you’ve made your changes, click Apply. The page should refresh and you might then be asked to enter the username and password for the router.
Remember, if you're setting up your cable modem for the very first time, you'll need to activate your broadband account before you can using the internet. Once you've gone through the steps above, just start up a web browser and go to this address:
http://activation.virginmedia.com/
And you’re done! Your PC should now be connected to the internet through your wireless router.
Want to connect another computer wirelessly?
No problem. Once you've gone through the initial setup, connecting another computer to the wireless network is very easy.
Just repeat Step 7 above to connect another PC to your wireless network. You'll be asked for your WPA passphrase, which you should’ve changed during the initial setup. As soon as that’s accepted, you’ll be connected. Simple!
- View Answer at http://help.virginmedia.com/system/selfservice.controller
- Not the answer you were looking for?
- Click a problem area below for more Internet solutions
-
- Not sure where to start, try searching our site